
Blog
Baseplate Compass vs. Lensatic Compass: Differences and Uses

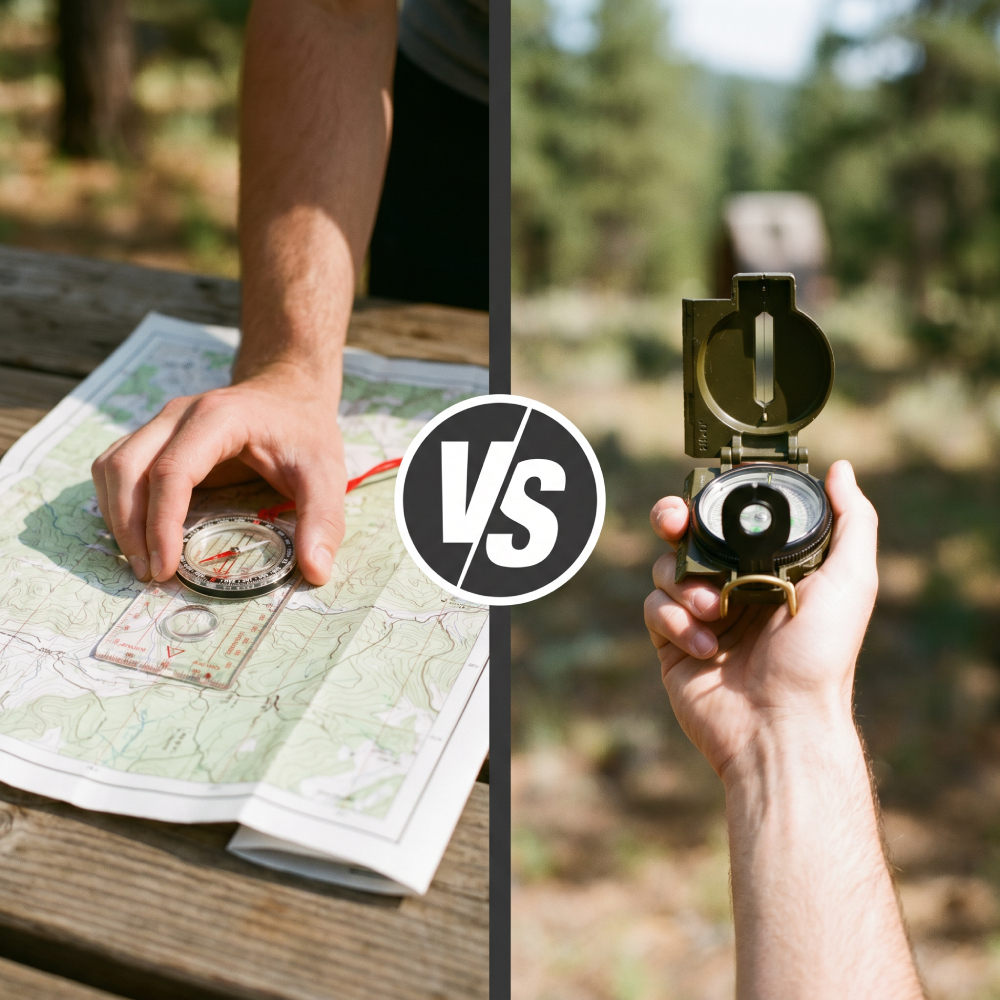
Anyone who's ever stood in front of a shelf of compasses has wondered why they don't all look the same. Some are flat, clear plates with engraved rulers. Others open up like a small metal book, complete with a sighting wire and a magnifying lens. Both point north, but they're built for completely different jobs. Below, we break down the difference between a baseplate map compass and a military-style lensatic sighting compass, and how to use each one correctly.
What a Compass Actually Does
Let's get one thing straight: a compass alone doesn't tell you where you are. It isn't a GPS. Paired with a map and visible landmarks, it can help you figure that out—but on its own, all it does is give you a direction of travel from point A to point B. Everything that follows is about making sure the arrow you're following actually points where you think it does.
The Map Compass (Baseplate)
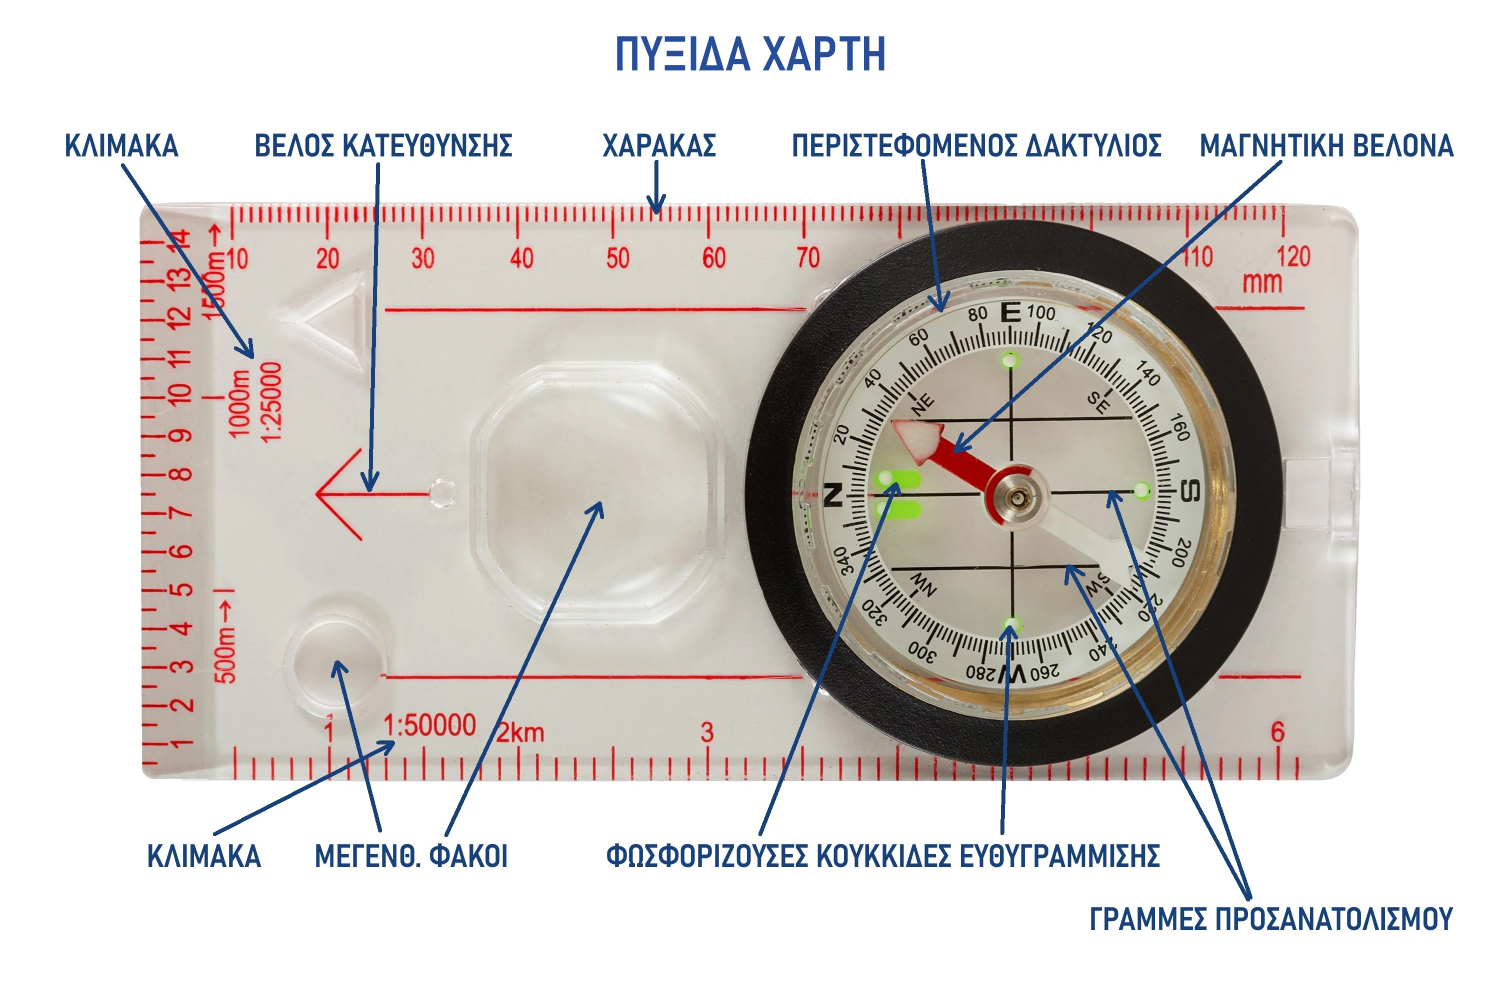
This is the clear, rectangular compass designed to sit directly on your map. The rotating bezel is built into a transparent base printed with rulers, magnifying lenses, and sometimes romer scales calibrated to common map scales like 1:25,000 or 1:50,000. Romer scales serve one main purpose: reading precise grid coordinates off a map.
Because it's transparent and features straight edges, it lets you work with a map and find your direction in one swift move, without needing a separate ruler or protractor.
You need three things: a baseplate compass, a map of the area, and known starting and destination points. Lay your map and compass down on a flat surface—the ground, a rock, etc.
Step 1 — Plot Your Course Line
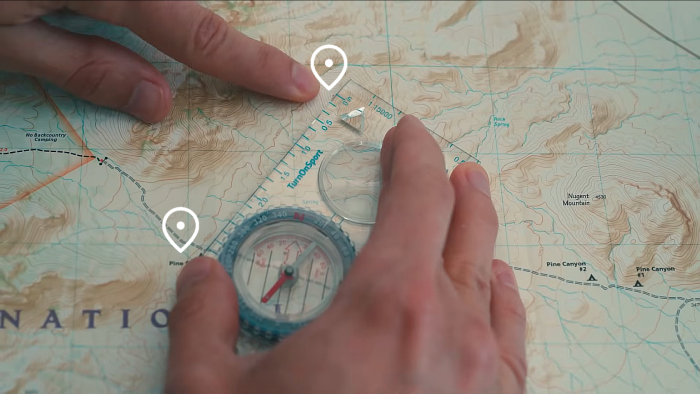
Use the straight edge of the compass base to connect your starting point with your destination on the map. Make sure the direction-of-travel arrow on the base points toward your destination, not backward. At this stage, you're simply drawing a line between two points—nothing more.
Step 2 — Orient the Bezel to the Map
Keeping the compass firmly in place along that line, turn the bezel until the orienting lines printed inside it are parallel to the north grid lines on your map. Important: if the bezel lines don't line up correctly with the map lines, every step that follows will be off. This step is strictly about aligning the bezel with the map.
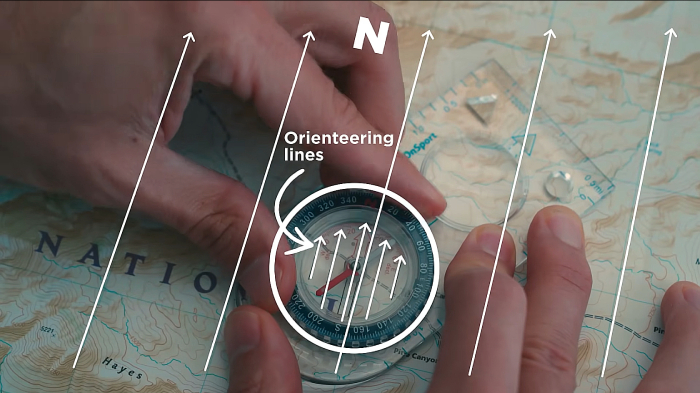
Step 3 — Read Your Bearing
Look at the number on the bezel right next to the small index line on the base. That number is your bearing—the course you need to follow, in degrees, on a 0–360° circle where 0° is north, 90° is east, 180° is south, and 270° is west. Jot it down or keep it in mind. This single number is all you need for the rest of your trek.
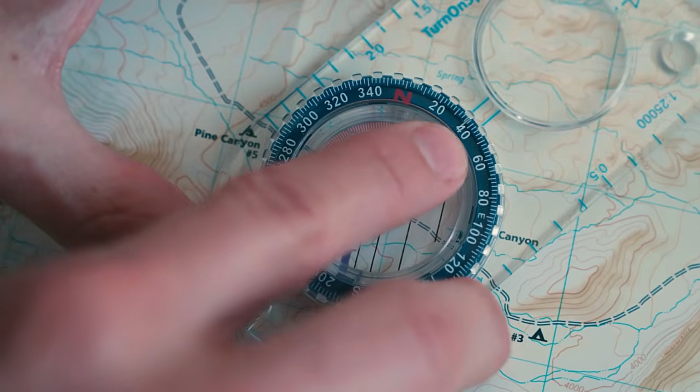
Step 4 — Follow Your Bearing
Now, and only now, does the magnetic needle come into play. Hold the compass level and steady in your hand, and turn your entire body—not the bezel—until the needle settles inside the orienting arrow printed in the housing. This is often called "put the red in the shed." Once the needle is inside that arrow, the direction-of-travel arrow on the base points right where you need to walk. Follow it, keeping the compass flat and the needle inside the "shed" as you go.
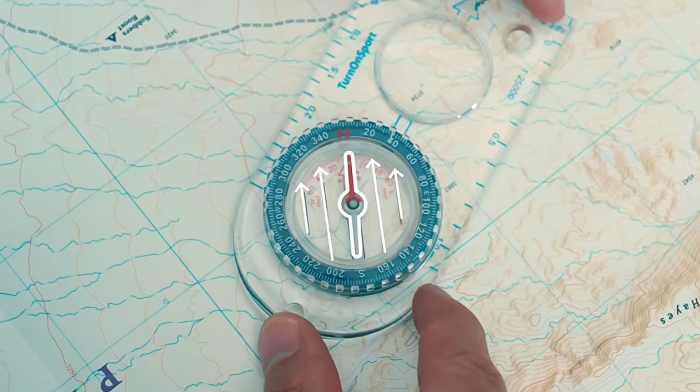
When You're Given a Bearing Up Front
Sometimes you don't even need to figure out a bearing—someone just hands you the number. In that case, jump straight to dialing that bearing into your bezel and follow step 4. Instead of staring constantly at your compass, it's often easier to sight a landmark that sits along your line of travel—a tree, a peak, a boulder—and walk toward it. If an obstacle pushes you off course (a river, a drop-off), that's completely normal: just get your bearing again and keep moving. It's good practice to recheck your bearing regularly, especially after detouring around an obstacle.
The Handheld Compass (Lensatic)
This is the folding compass in olive drab or black—often called a military-style compass. It features a hinged cover with a fine sighting wire, a rear sight with a magnifying lens, and a floating dial marked in both degrees and mils. The ruler on most of these corresponds to a specific map scale and is usually stamped right into the metal housing. That means if your map's scale doesn't match the ruler, your distance estimates won't be what you think. But the handheld lensatic compass has a different core purpose: taking an exact bearing to a distant target by sighting through the wire and reading the dial through the lens in a single glance—which is why it's also called a "sighting compass."
The lens doesn't make it inherently more accurate than a map compass—the needle is still just a magnet—but the sighting wire allows for much more precise targeting on a landmark. The downside is that for genuinely accurate map work, you'll need a protractor. Generally speaking, though, your readings will get you heading the right way.
How to Use It Properly
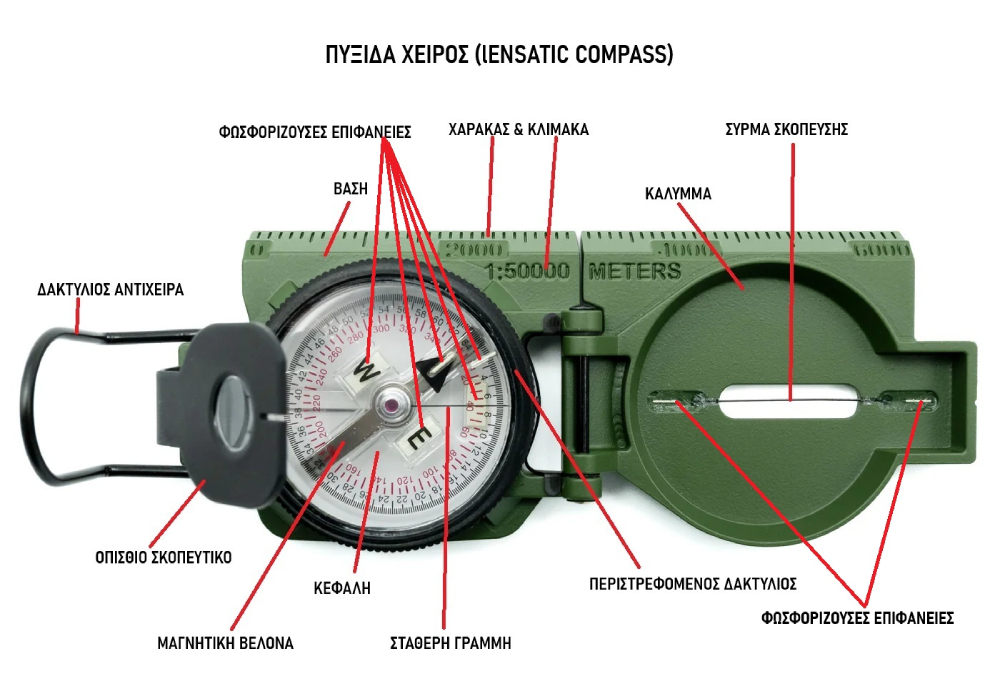
Before doing anything else, inspect your compass: the glass must be intact, the dial should float freely and be easy to read, and the sighting wire must be straight.
There are two distinct things you can do with a lensatic compass, and they use different parts of the tool:
- Taking an azimuth: you sight an object you can see and read the bearing to it. This uses the center-hold or compass-to-cheek technique, and the bezel isn't adjusted at all.
- Presetting and following an azimuth: you walk along a bearing you already know—whether from a map or given to you by someone else. This is where the rotating bezel comes into play.
Taking an Azimuth — Center-Hold Technique
This is the primary, go-to method for taking a reading, and it works well in all lighting and terrain conditions.
Open the compass completely so that the cover and base form a straight line. Fold the rear sight (lens) all the way back so the dial floats freely. Slip your thumb through the thumb loop, support the base with your third and fourth fingers, and extend your index finger along the side. Bring your other hand up for support: place your thumb between the lens and bezel, your index finger on the opposite side, and wrap your remaining fingers around your primary hand. Pull your elbows tight against your ribs so the compass stays level, right between your chin and belt line.
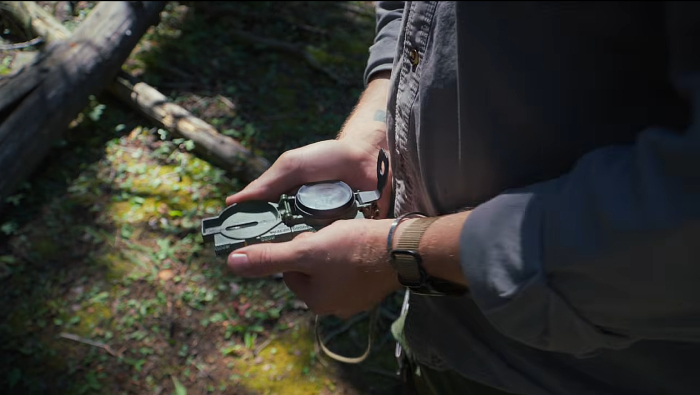
To take a reading, turn your entire body toward the object, pointing the compass cover straight at it. Look down and read the azimuth beneath the fixed black index line. That number is your azimuth to the target.
Taking an Azimuth — Compass-to-Cheek Technique
This is used almost exclusively for precise sighting, and it's your best bet when you need pinpoint accuracy on a distant, specific landmark.
Fold the cover (with the sighting wire) into an upright vertical position, then tilt the rear sight slightly forward. Look through the rear sighting slot and align the front sighting wire with your target. Without shifting your head, glance down through the lens and read the azimuth off the dial.
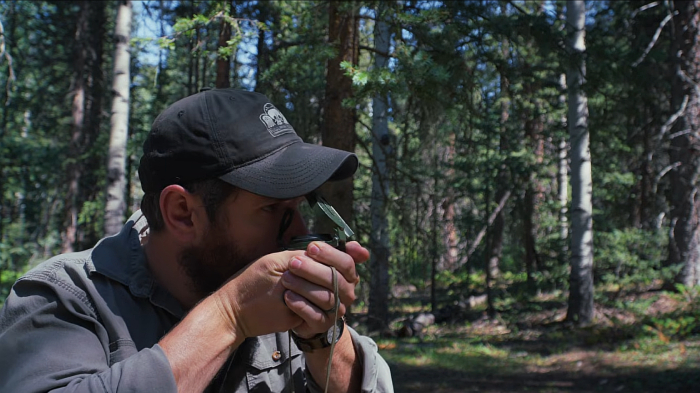
Both techniques answer the same question—"what's the direction to that object?"—with the sighting method trading speed for extra precision.
Presetting and Following an Azimuth (Daylight)
This is a different task: you already have a heading and need to walk it. This is where the bezel comes into play.
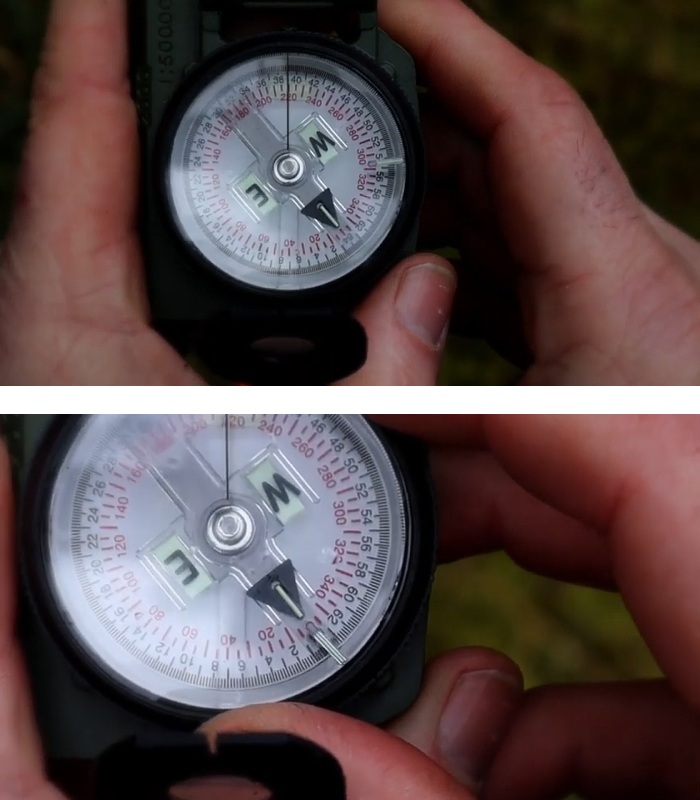
Hold the compass flat in your palm. Rotate the entire body of the compass until your desired azimuth falls directly under the fixed black index line—say, 220°. Now turn the bezel itself until its small luminous line aligns with the magnetic needle (the arrow pointing north). Once aligned, your compass is preset—the bezel now "remembers" your azimuth relative to magnetic north.
To follow it: holding the compass in the center-hold position, turn your whole body until the needle re-aligns with the luminous line on the bezel. Walk in the direction pointed by the front sighting wire. As long as the needle stays lined up with that luminous line, you're right on track.
Presetting and Following an Azimuth (Darkness or Low Light) — The "Click" Method
In the dark, you can't read the tiny numbers on the dial, so this technique relies on the bezel's "clicks" instead. The bezel clicks as you turn it—120 clicks for a full rotation, or 3° per click.
Rotate the bezel until its luminous line sits directly over the fixed index line. Take your desired azimuth and divide it by three—that's how many clicks you need.
If the azimuth is less than 180°, count that many clicks counterclockwise. Example: an azimuth of 51° ÷ 3 = 17 clicks counterclockwise.
If the azimuth is 180° or more, subtract it from 360°, divide by three, and count that many clicks clockwise. Example: 360° − 330° = 30° ÷ 3 = 10 clicks clockwise.
With the bezel set this way, use the center-hold technique and turn your body until the needle lines up with the bezel's luminous line, just like in daylight. Then walk toward the two luminous dots on the front cover, which mark the exact line of travel defined by the fixed index line.
A detail worth keeping in mind: azimuths not evenly divisible by three will force you to round up or down by a degree or two. If you round up, your true azimuth—and your target—will be slightly to your left; if you round down, it'll be slightly to your right. That's worth remembering when you're aiming for something small, like a hidden campsite in the dark.
If you know you'll be navigating after sunset, set your azimuth while there's still light out if possible—it's much easier to get it right when you can clearly see the dial.
Why the Distinction Matters
The center-hold and compass-to-cheek techniques answer "which way is that landmark?". Presetting and following answers "how do I walk along this direction I already know?". They aren't interchangeable—most real-world navigation with a lensatic compass uses the preset-and-follow method, since you're typically marching on a known heading rather than constantly sighting a visible target.
Which One Do You Actually Need?
They aren't really competing tools—they serve different purposes. A baseplate map compass is the best everyday choice for hiking and map-based navigation because it handles orienting maps, taking bearings, and plotting coordinates all in one lightweight, affordable piece of plastic. A lensatic compass shines when you need an exact azimuth to a distant landmark—in open or featureless terrain—and when durability matters more than effortless map work. In land navigation training, a lensatic is typically paired with a separate map and protractor, rather than replacing a map compass altogether.
Magnetic Declination — The Setting Beginners Forget
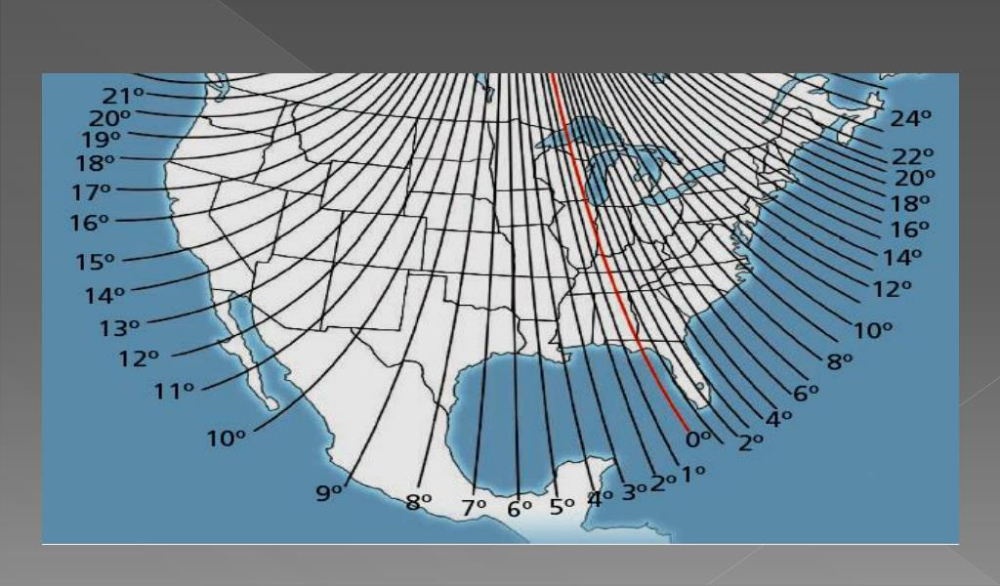
The north arrow on your map points to true north—fixed and calculated. Your compass needle doesn't point to true north; it points to magnetic north based on the Earth's magnetic field, which can vary by a few degrees or, closer to the poles, by 30° or more. Most topographic maps list the local magnetic declination, or you can look it up online for your area.
The rule of thumb: if declination is east, subtract it from your bearing; if it's west, add it. A handy way to remember this is "east is least, west is best"—east means subtract, west means add. For instance, a 38° bearing with a 4.5° east declination becomes 33.5° after adjustment. On a short hike, this correction might not seem like much, but it's the exact detail that causes real drift over longer distances, so it's always worth factoring in rather than ignoring.
Some baseplate compasses feature built-in declination adjustment that you set once and forget; for those that don't, you simply do the math manually each time you take a bearing.
Final Thoughts
A baseplate compass and a lensatic compass aren't just the same tool in different shapes—they solve different problems. Figure out what job you need done first (navigating by map or sighting a distant target) and choose your tool accordingly. Many experienced outdoorsmen end up carrying both.
At Adventure Gear, you'll find baseplate and navigation compasses, as well as military-style lensatic compasses, built for every mission—from weekend treks to tactical field use.
Have questions about a specific compass model or field use? Drop a comment below.
.